

Mason, Texas is a small town on the northern edge of the Texas Hill Country. We have a growing number of wineries, and wine-tasting rooms in town, and a thriving bed and breakfast industry. So, there are also several family-owned restaurants in town. Most of these restaurants actually prepare their own food on site, instead of just reheating Sysco prefab food. Preparing their own means using lots of celery and scallions. The celery bottoms and the white portions of the green onion are chopped off and discarded. By asking the restaurants for these discards, I’ve been able to experiment with growing my own celery from celery bottoms.

Propagating celery bottoms in central Texas
This part of Texas is in USDA zone 8A. Celery does not grow in regions 8 through 10, due to the high heat in summer and dry conditions. Celery is a cool weather crop that likes moist and nutritious soil, with morning sun and afternoon shade. Growing celery from seed to harvest maturity takes anywhere from 3 to 5 months, and you cannot plant celery while the soil is below 50 degrees F (10 C). Assuming you start the seeds indoors during the winter, and transplant when the soil is warm in late February or early March, the weather could be in the triple digits (over 40 C) in May and June. So, I suspect the only way to grow my own celery here is to propagate the stalk bottoms instead of starting from seed.
Growing celery from celery bottoms shortens the process. I am still experimenting to see if celery stalk bottoms transplanted to outdoor containers in late August and early September can reach harvest size before the weather becomes too cold in the late fall.
Indoors versus outdoors
I suspect I will have best results with propagating celery bottoms indoors. For this, I will use a single plant pot per stalk bottom as my container, with about 4-5 inches (10-13 cm) of space between the celery bottom and the sides of the pot all around.
Please watch for updates in future posts.
Growing Your Own Celery from Celery Bottoms
Equipment
- 1 container of suitable size (You can use a plant pot and grow indoors, or a container, such as a 5-gallon bucket or livestock lick tub to plant several bunches. )
- 1 can of paint primer optional
- 1 can of bright paint optional
- 1 drill with large twist bit
Materials
- potting soil (enough to fill the container of choice)
- gardening compost (to mix with potting soil and mulch around celery)
- plant fertilizer
- celery bottoms
Instructions
Start the celery bottoms:
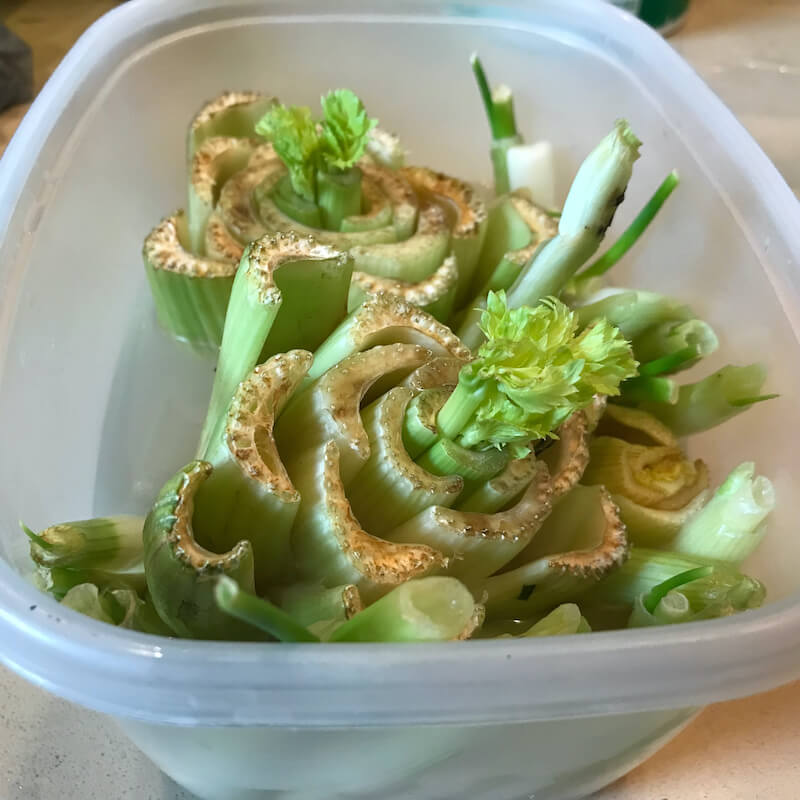
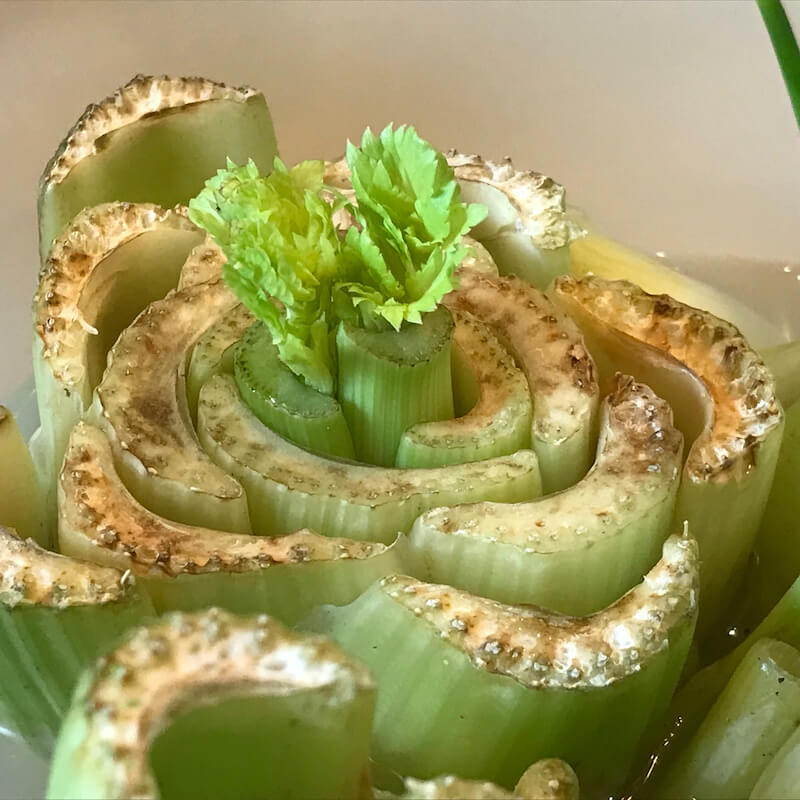
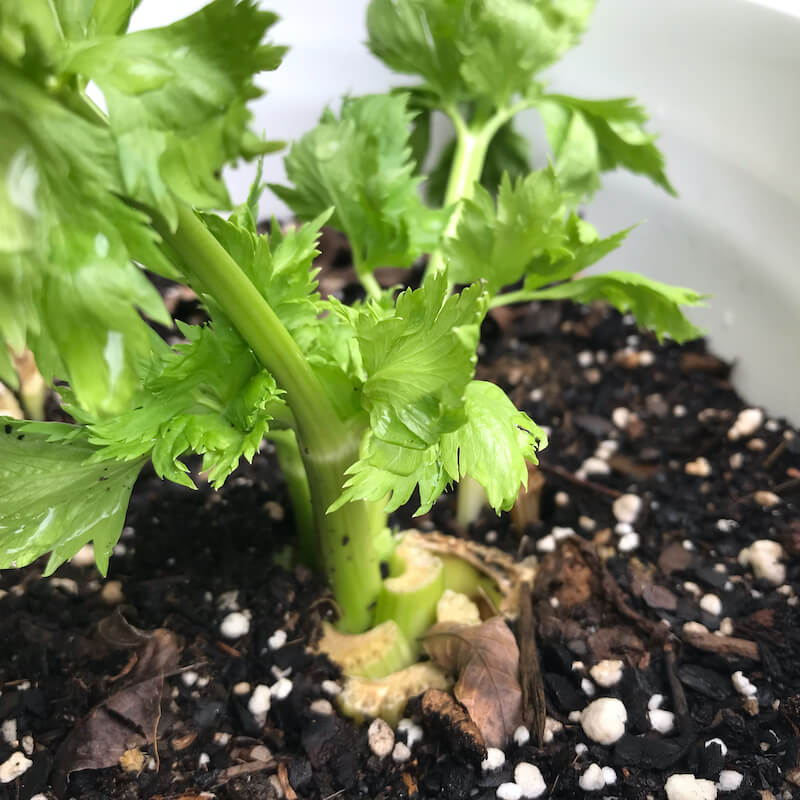
- Whenever you purchase a bunch of celery, cut the bottom from the stalk about 2-3 inches (5 to 7.5 cm) from the root base.

- Place the celery bottom water, about halfway up the side of the stalk. Place the container where the plants can receive some light in the mornings, and shade later in the day.
- When sprouts and new roots begin to appear, it is time to transplant the celery bottoms.
Prepare the container:
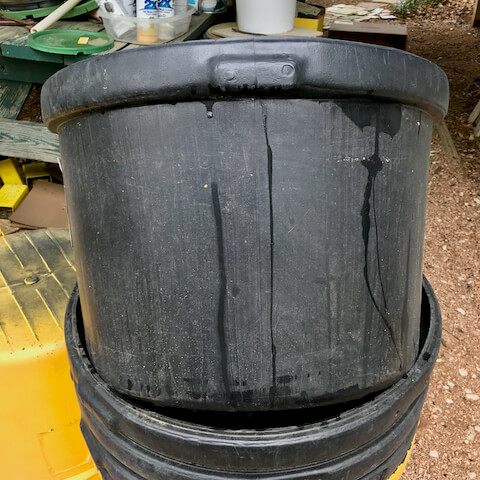
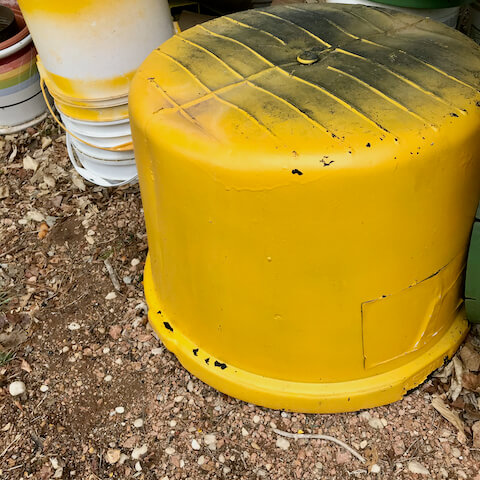
- I like to use discarded "lick tubs" used to provide range cattle with mineral blocks. These are easy to find at the town dump.
- Clean the container inside and out.
- Here in Texas, we get some days in excess of 100 degrees, so I like to paint my containers with a bright, reflective color, as the black tubs will absorb too much heat from the sun. Spray the outside with a coat of primer, such as Rustoleum, and let dry overnight. Spray over the primer with the finish color. Let dry over night. Add a second coat if desired.
- When the container is painted, turn it upside down and drill several holes in the bottom for drainage.
- A large container, like a lick tub, can hold 100 lbs of soil, making it too heavy to move without breaking the tub. So I fill the bottom with empty plastic milk jugs lying on their sides.
- Add potting soil, or a compost and soil mix.
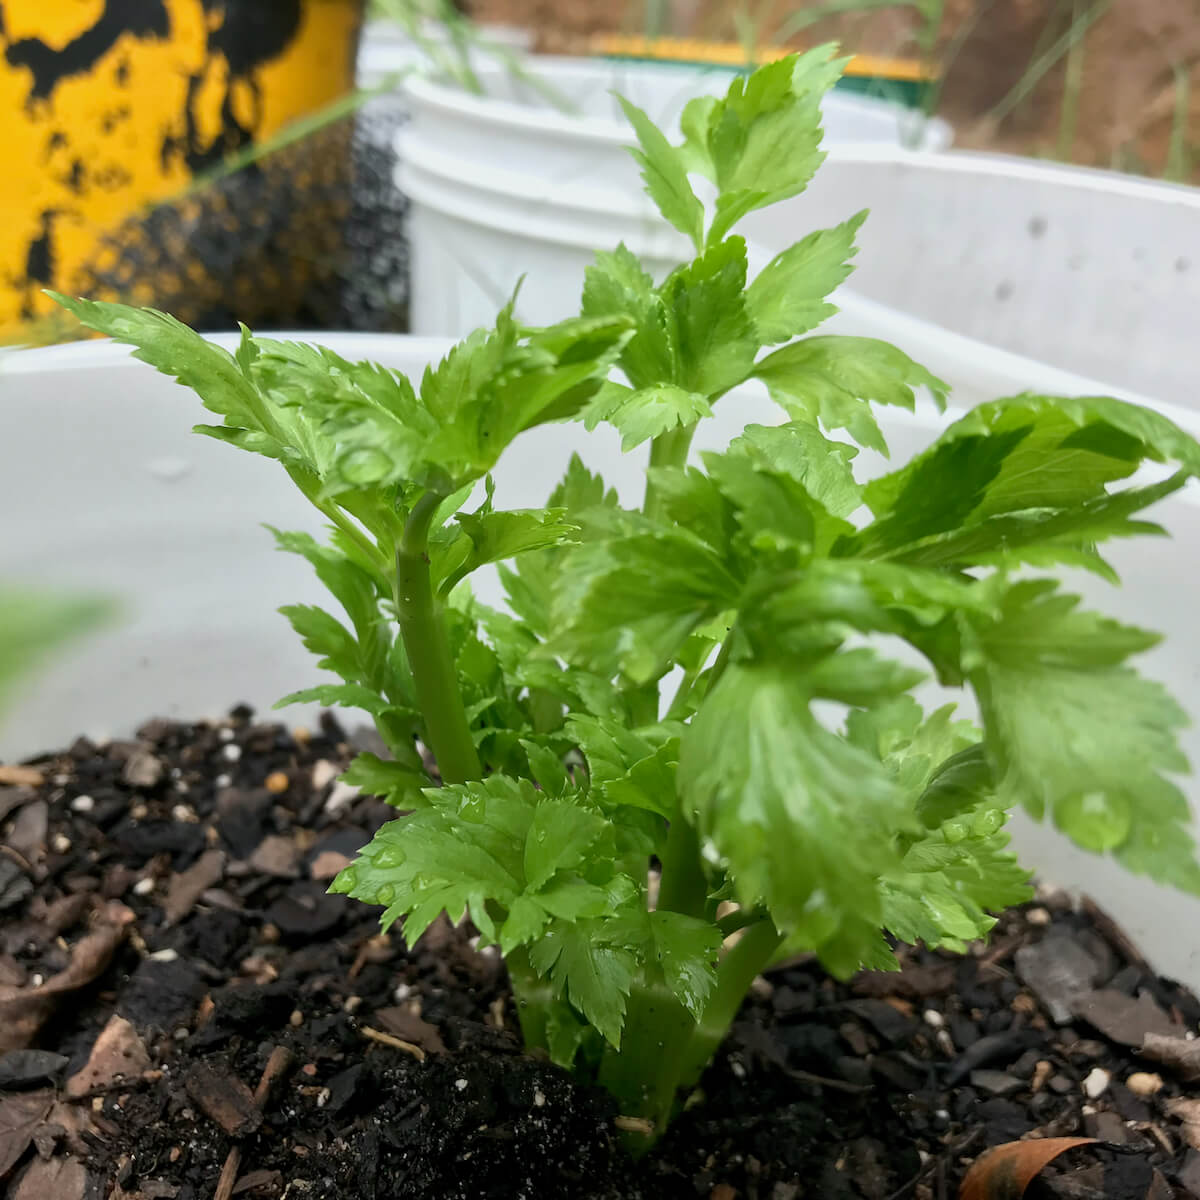
Transplant the celery
- Make a hole in the soil wide enough and deep enough to hold the root portion and base of the celery. Do not go too deep, the stalks remain above the soil
- Moisten the soil until it is damp. Place a celery bunch in the hole, roots first and gently fill around it with your hand.
- Add a little plant fertilizer according to package instructions, and water the fertilizer into the soil.
- Keep the soil damp, but not wet.
- If you plant celery in your garden, bank the sides with weed-free compost.
- You can begin to harvest when stalks reach 6 inches.
Notes
- Do not let the soil dry out. Keep the soil damp, but not wet.
- Celery does not tolerate drought.
- Fertilize adequately. If you see thin stalks, the plant is not getting enough nutrients.
- In zones 8-10, summer temperatures and dry conditions will kill celery in the garden. However, you can raise the plants indoors in planters.
- Celery needs sunlight in the morning and shade in the afternoon.
- Local restaurants can be a good source for celery bottoms.
Do you enjoy My Chinese Home Kitchen?
We enjoy sharing these authentic home recipes with you. Learn more about My Chinese Home Kitchen at our About page.
Please leave a comment, or SUBSCRIBE to our newsletter.
For more of our original videos, visit My Chinese Home Kitchen on YouTube and Rumble.
